
DIY Wardrobe Door — Step-by-Step Guide for Beginners
Feb 03, 2024


In a world where convenience is king, the quest for efficient home maintenance solutions is never-ending. Enter the revolutionary concept of DIY gutter guards — your ultimate ally against the tedious task of gutter cleaning.
Among the myriad chores homeowners face, keeping gutters clean and functional tops the list of seasonal headaches. However, the dread of climbing ladders in the rain to unclog gutters could soon be a tale of the past, thanks to this ingenious DIY hack.
By opting for a DIY gutter guard solution, you not only save a significant amount of money but also ensure a durable and reliable gutter protection system. Ready to bid farewell to gutter cleaning for good? Keep reading for a comprehensive guide on crafting your very own gutter guards.

A roof gutter | Source: Pexels

A roof gutter | Source: Pixabay
Equipping your home with DIY gutter guards is a smart, cost-effective solution to a common household nuisance, and hopefully, this guide has walked you through the steps of creating your own gutter guards.
Eager to further enhance your home maintenance skills? Dive into our next article on tips on how to repair granular loss on your roof for knowledge to tackle another critical aspect of home upkeep.

If you're a homeowner without a curb ramp for your car, don't worry! You can make one yourself, ensuring smooth access to your driveway for everyone. Here's how it's done.
Feb 13, 2024

Whether you're aiming to protect your floor from the warmth of the embers or seeking to add an aesthetic flourish to your living space, this guide will walk you through creating the perfect DIY hearth pad for your home.
Apr 09, 2024

Granular loss is something most roofs experience and can be addressed in two ways. Continue reading for tips on both methods to repair granular loss and what you can do to prevent damage to your roof.
Jan 24, 2024

Unlock the secrets to crafting your own personalized piece of furniture with our DIY wooden bench guide—where simplicity meets elegance in your living space.
Apr 10, 2024

Bubble walls bring the benefits of surrounding yourself with nature into the comfort of your personal space. If you're considering installing one but want to do so independently, follow this DIY bubble wall guide.
Feb 09, 2024

Whether you're a seasoned DIY enthusiast or new to the world of homemade gadgets, continue reading for a step-by-step tutorial that will help you create a functional and reliable DIY boom sprayer.
Feb 18, 2024

Transform your space with a DIY Litter Robot Enclosure that effortlessly merges smart technology with style. Despite their convenience, high-tech litter boxes can sometimes clash with home aesthetics. Fortunately, there's a stylish DIY solution!
Feb 14, 2024
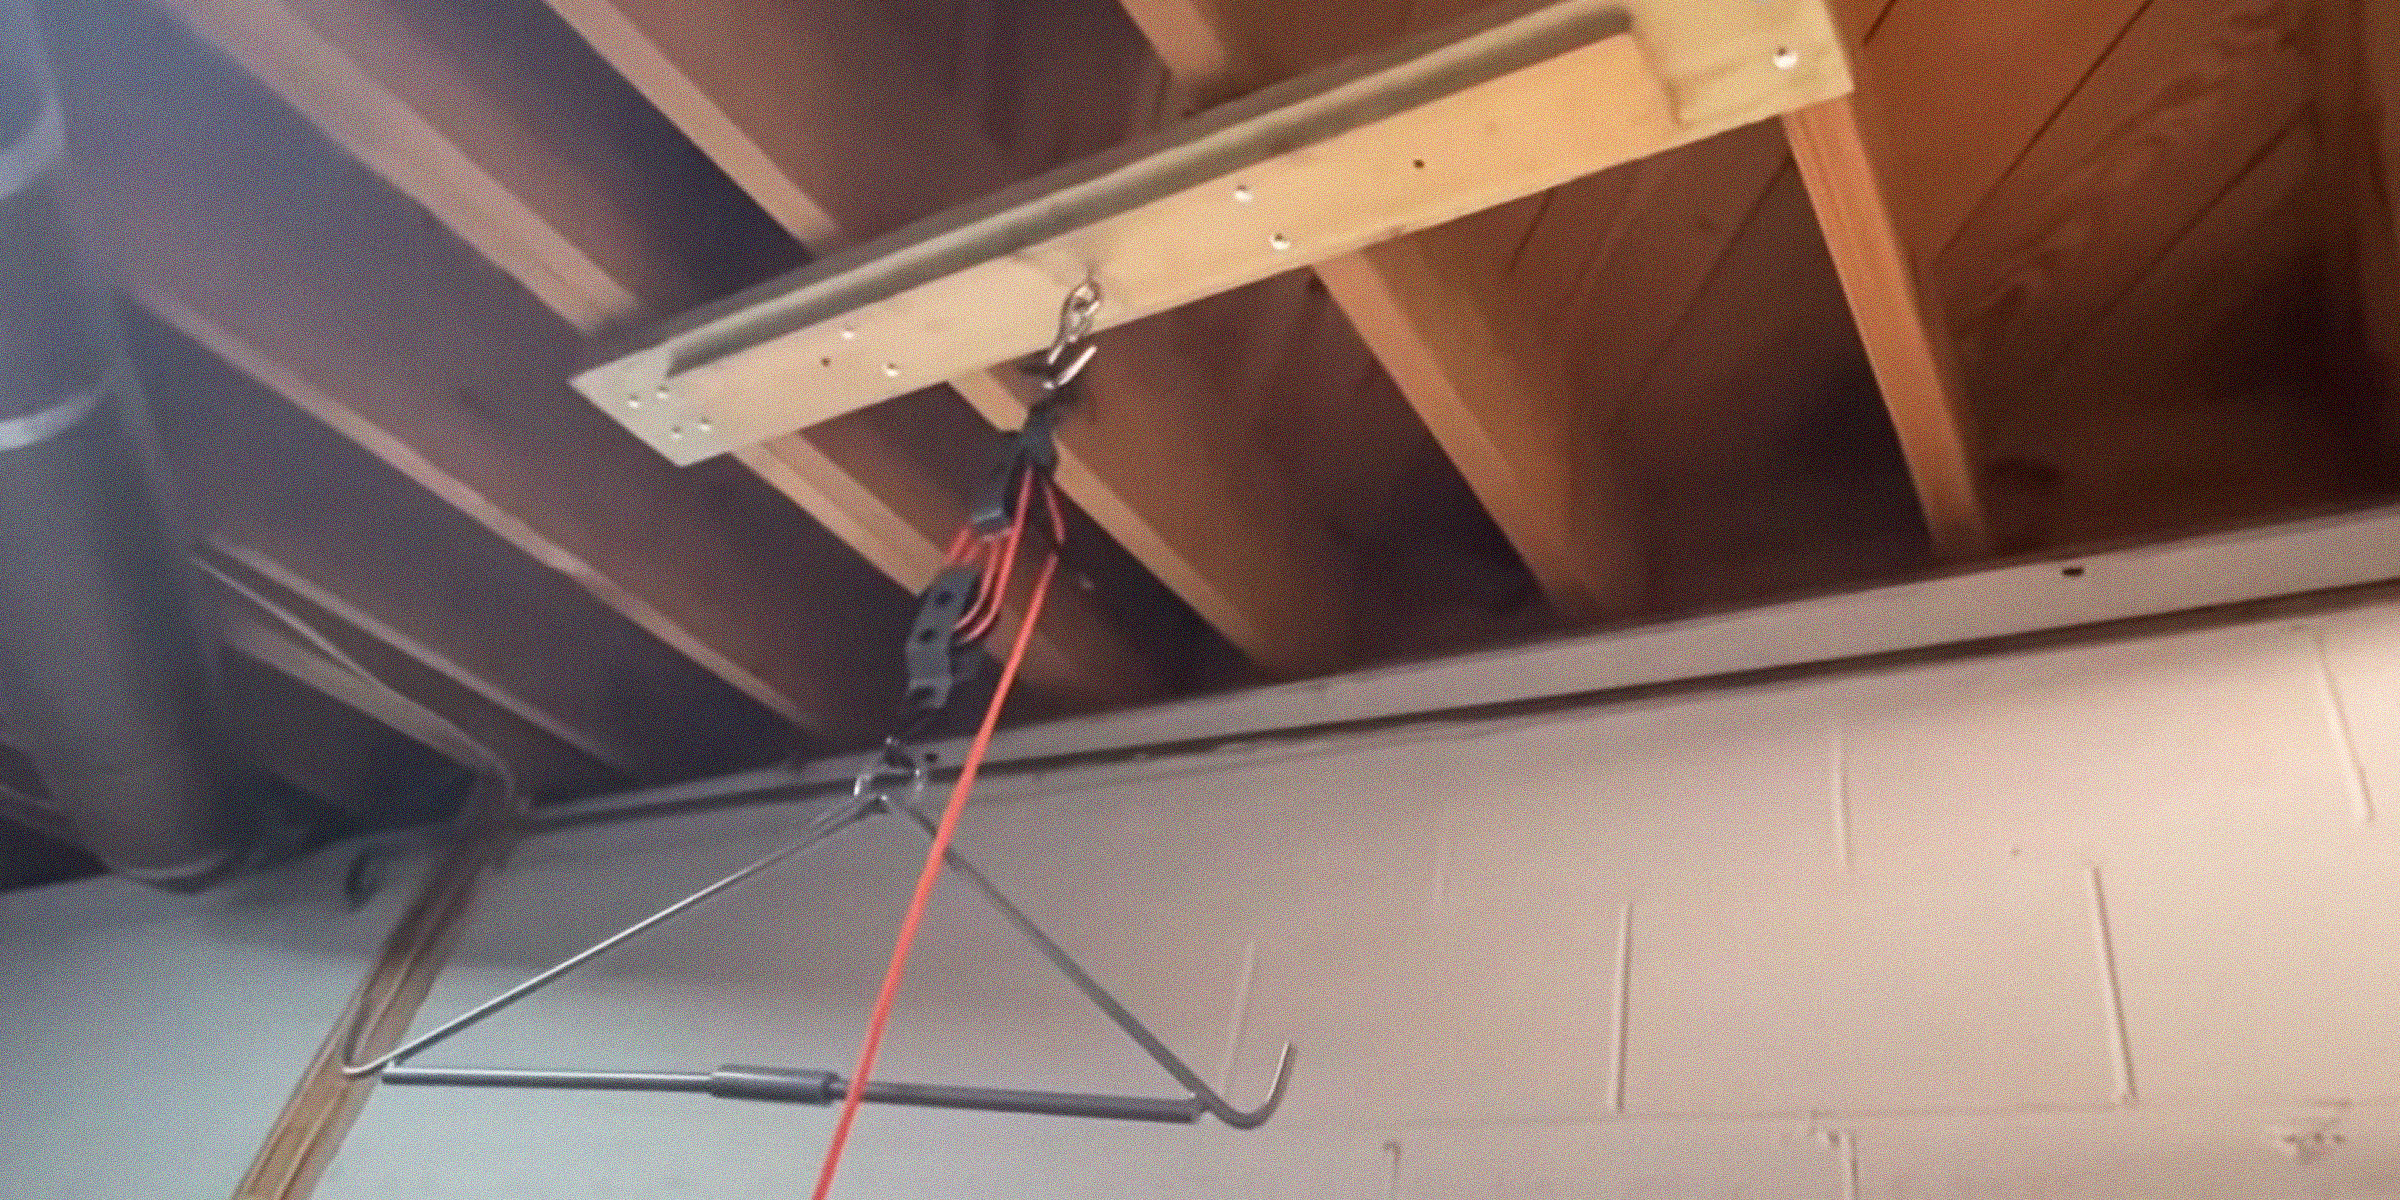
Whether you're a seasoned hunter or just getting started, a deer hoist is a helpful tool when hunting these large animals, and now, you can make this device in comfort of your home with this simple DIY deer hoist guide.
Feb 09, 2024

Looking to discover how to create a Murphy door for your home? You've come to the right place! Incorporate a unique hidden door into your space by crafting your own, following the detailed guide below.
Mar 12, 2024

Learning how to make a motorcycle seat can be immensely rewarding. With the right supplies, tools, and dedication, mastering the craft of creating your own seat is within reach.
Mar 19, 2024
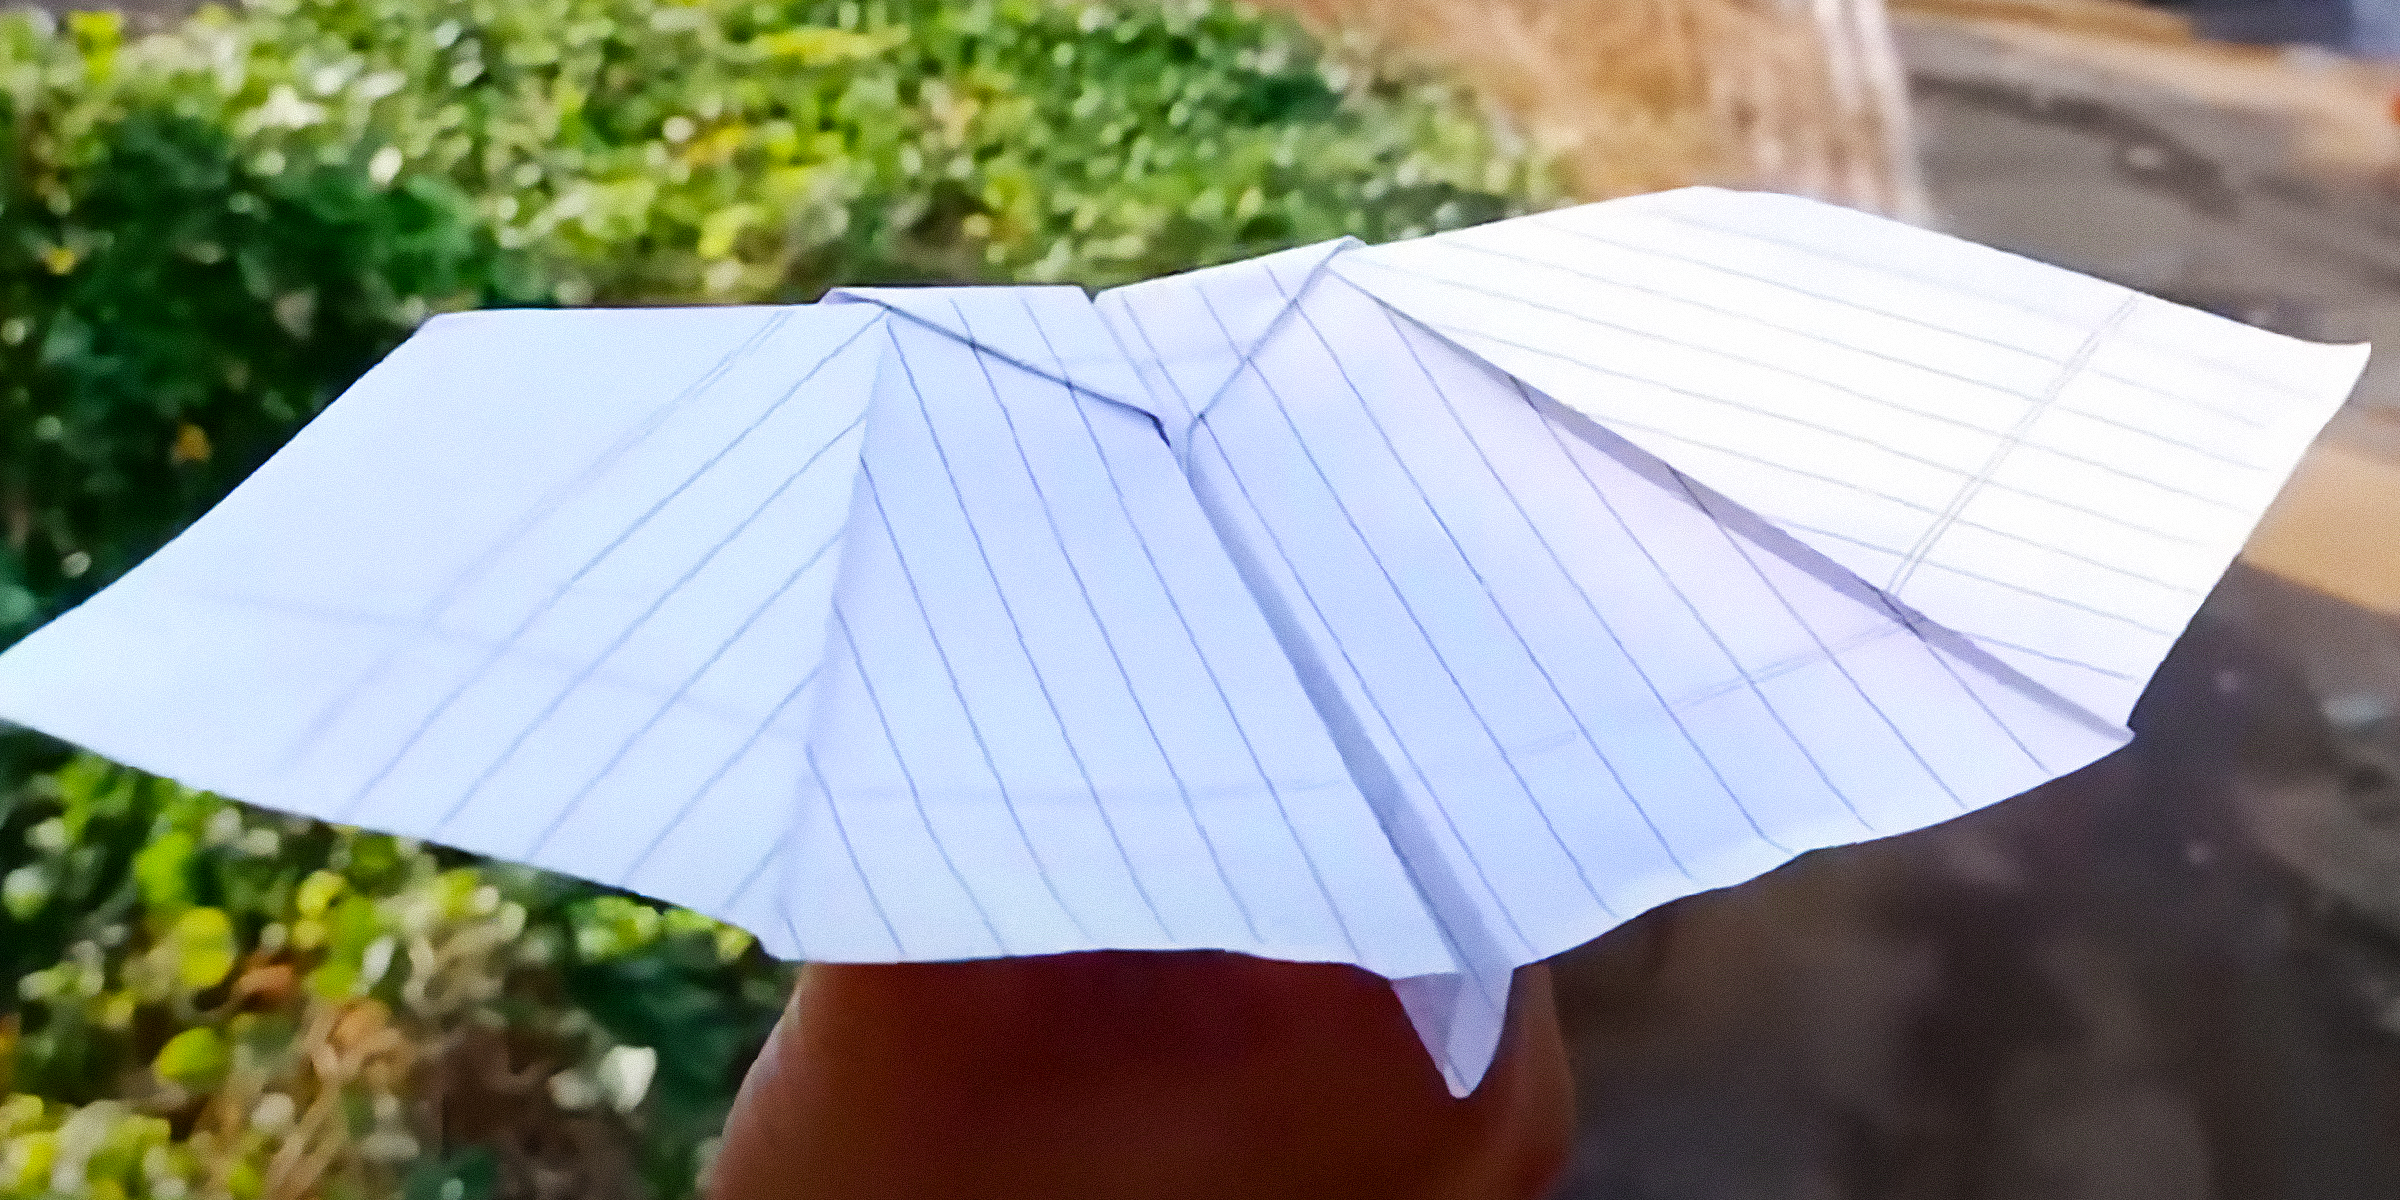
Paper planes have been around for thousands of years and have been the catalysts of human exploration into aerodynamics. In honor of the role these paper gliders have played in the history of this discipline, and simply for good fun, here's how to make a bat paper plane.
Jan 31, 2024
Discover the cost-effective joy of DIY slide boards! This article guides you through crafting your own, enriching your workout without breaking the bank. Save big while elevating your exercise routine.
Feb 04, 2024

Transforming long car rides with children into fun-filled adventures is possible. Yet, managing sibling conflicts can be tough. Explore inventive solutions to foster peace and harmony between your little ones.
Feb 15, 2024

Embark on a crafting journey that weaves together simplicity and elegance, as we explore the art of creating a ribbon rosette with this detailed guide that unfolds the secrets behind transforming ordinary ribbons into exquisite accessories.
Mar 24, 2024