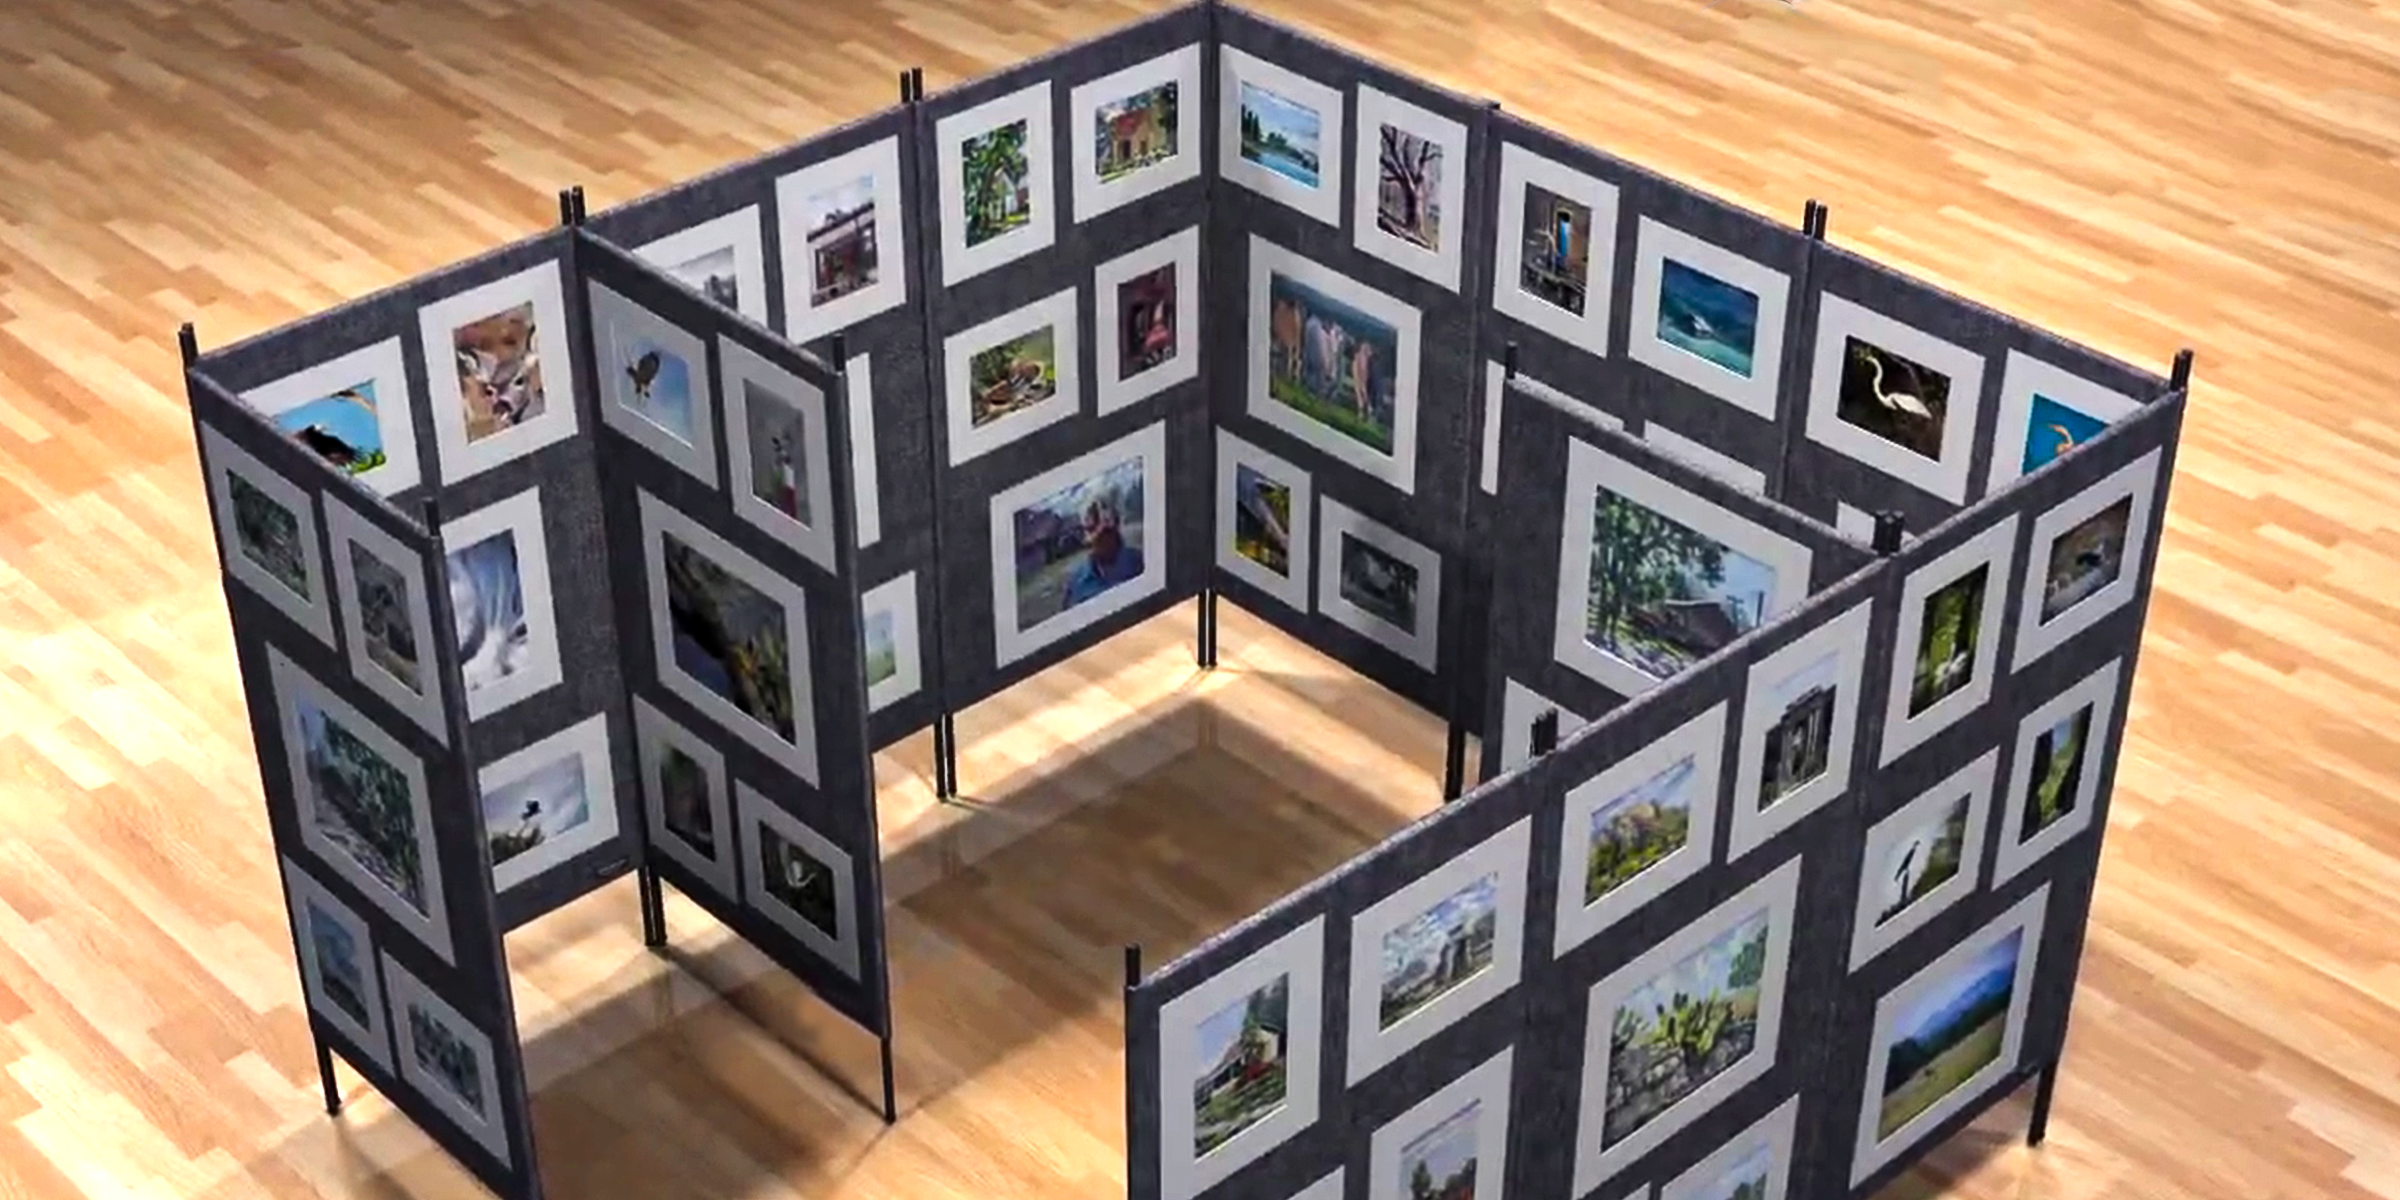
DIY Art Display Panels—2 Budget-Friendly Methods for Eye-Catching Exhibits
Apr 21, 2024


Transform your art displays from mundane to magnificent with DIY art display panels! This guide will walk you through creating custom panels that not only highlight your artistic achievements but also save you money.
In the world of art, presentation is just as crucial as creation. DIY art display panels offer a perfect solution for artists and enthusiasts alike to showcase their masterpieces in a professional yet personalized manner.
By crafting your own display panels, you not only tailor the viewing experience to your artistic vision but also save significantly on costs typically associated with professional art displays. Read on to transform simple materials into a stunning display that speaks volumes of your artistic flair.
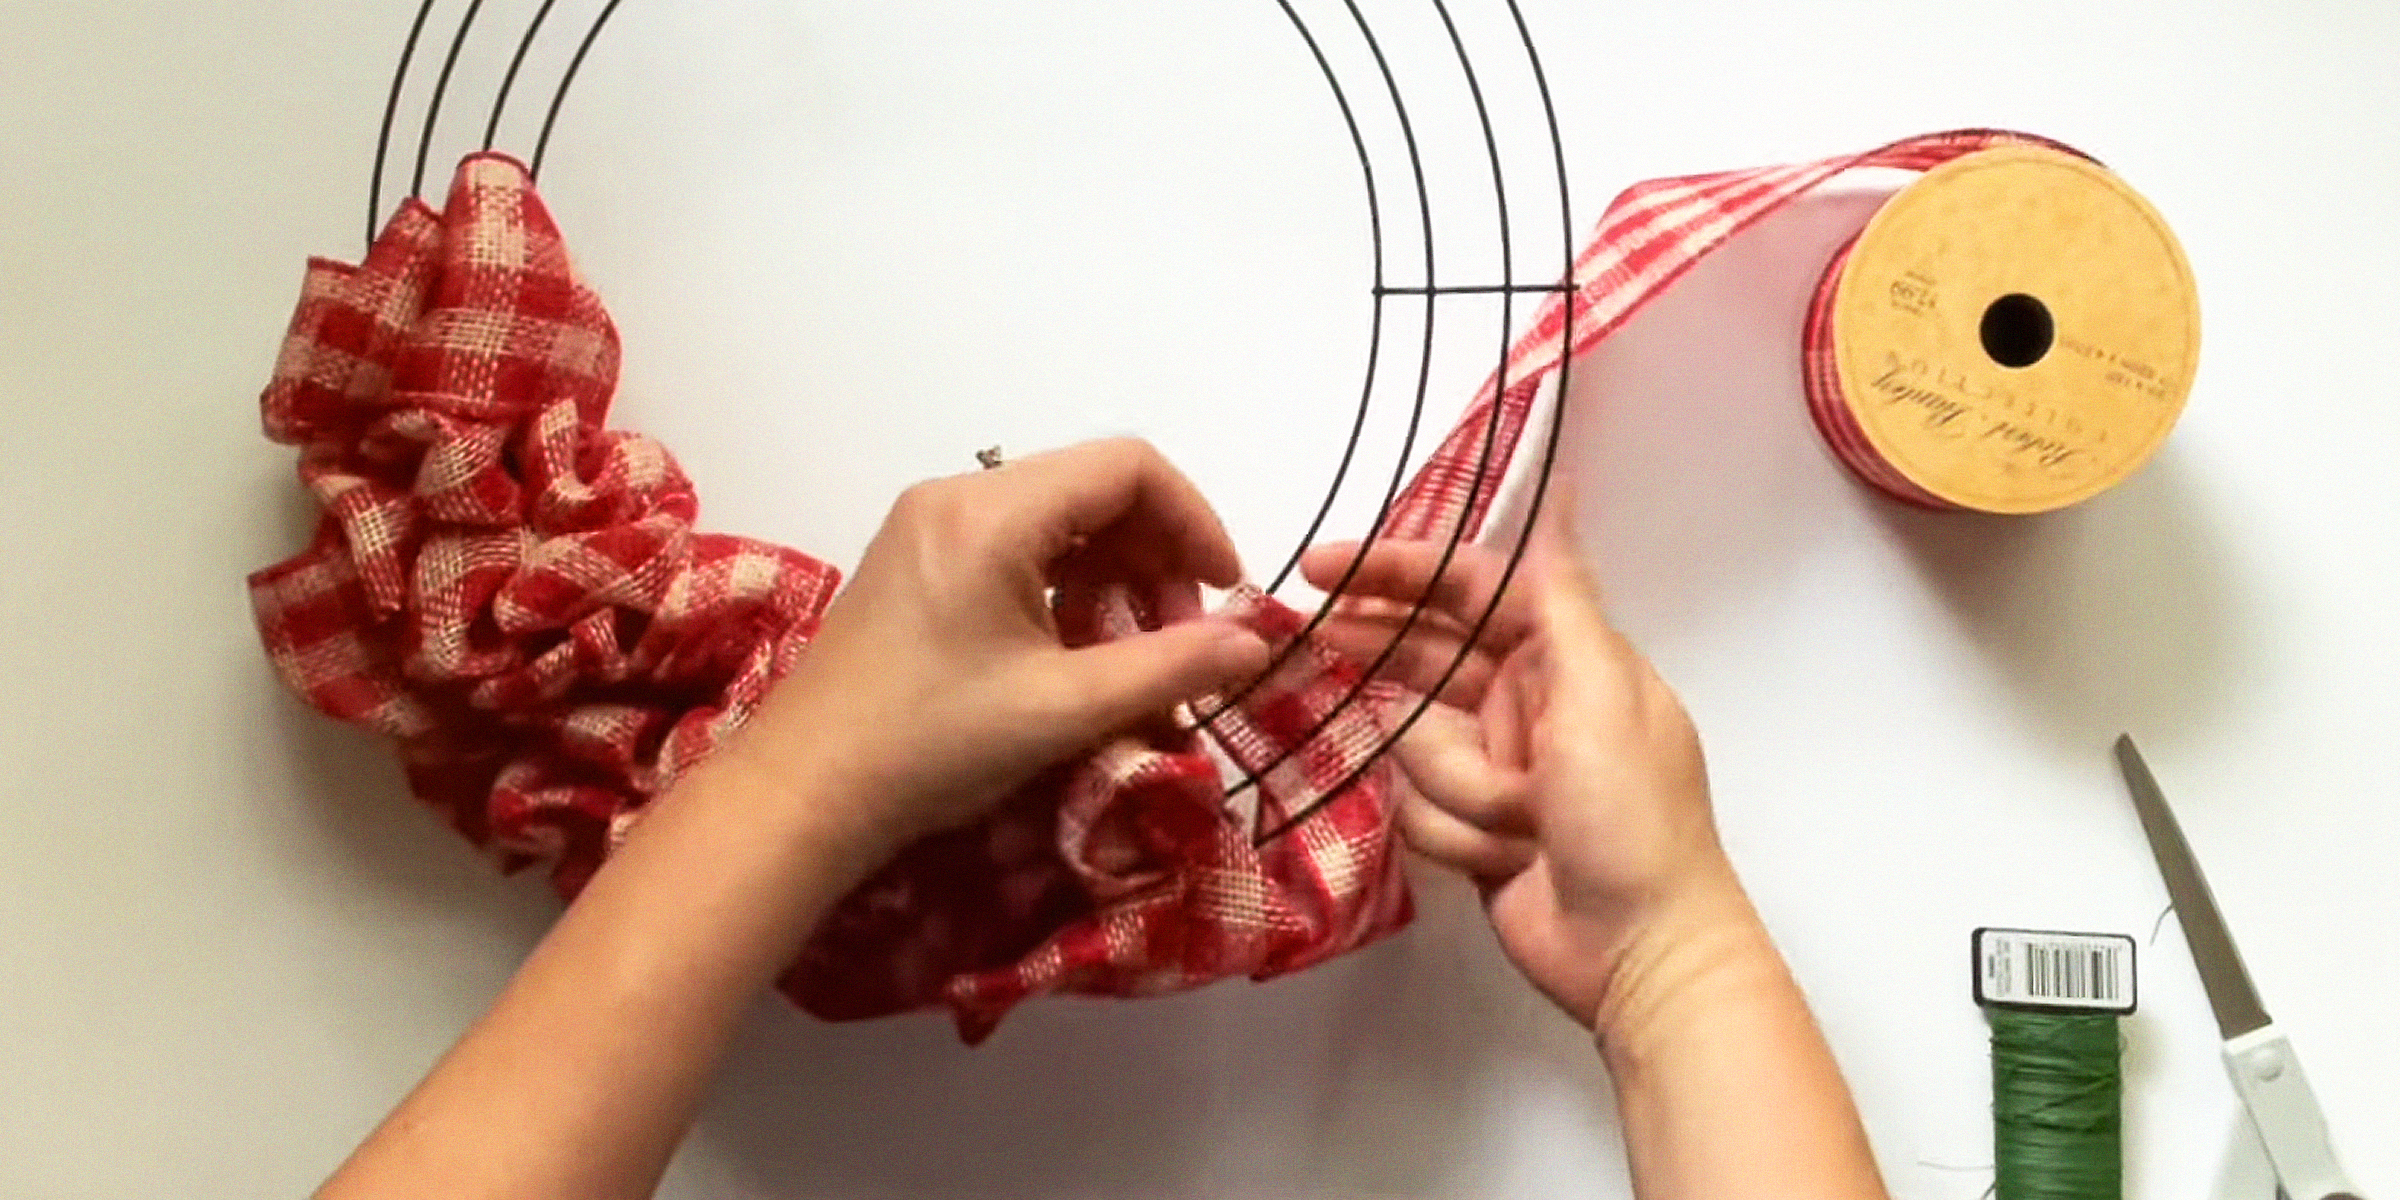
Prepare the Screen Door:
Attach the Wire Mesh:
Adding the Felt Cover:
By following these detailed steps, you transform basic materials into elegant DIY art display panels that not only highlight your artwork but also reflect your do-it-yourself skills and artistic dedication.
Eager to take on more DIY projects? Dive into our next guide on how to DIY a steering wheel cover and continue transforming everyday items into personalized expressions of your style and ingenuity.
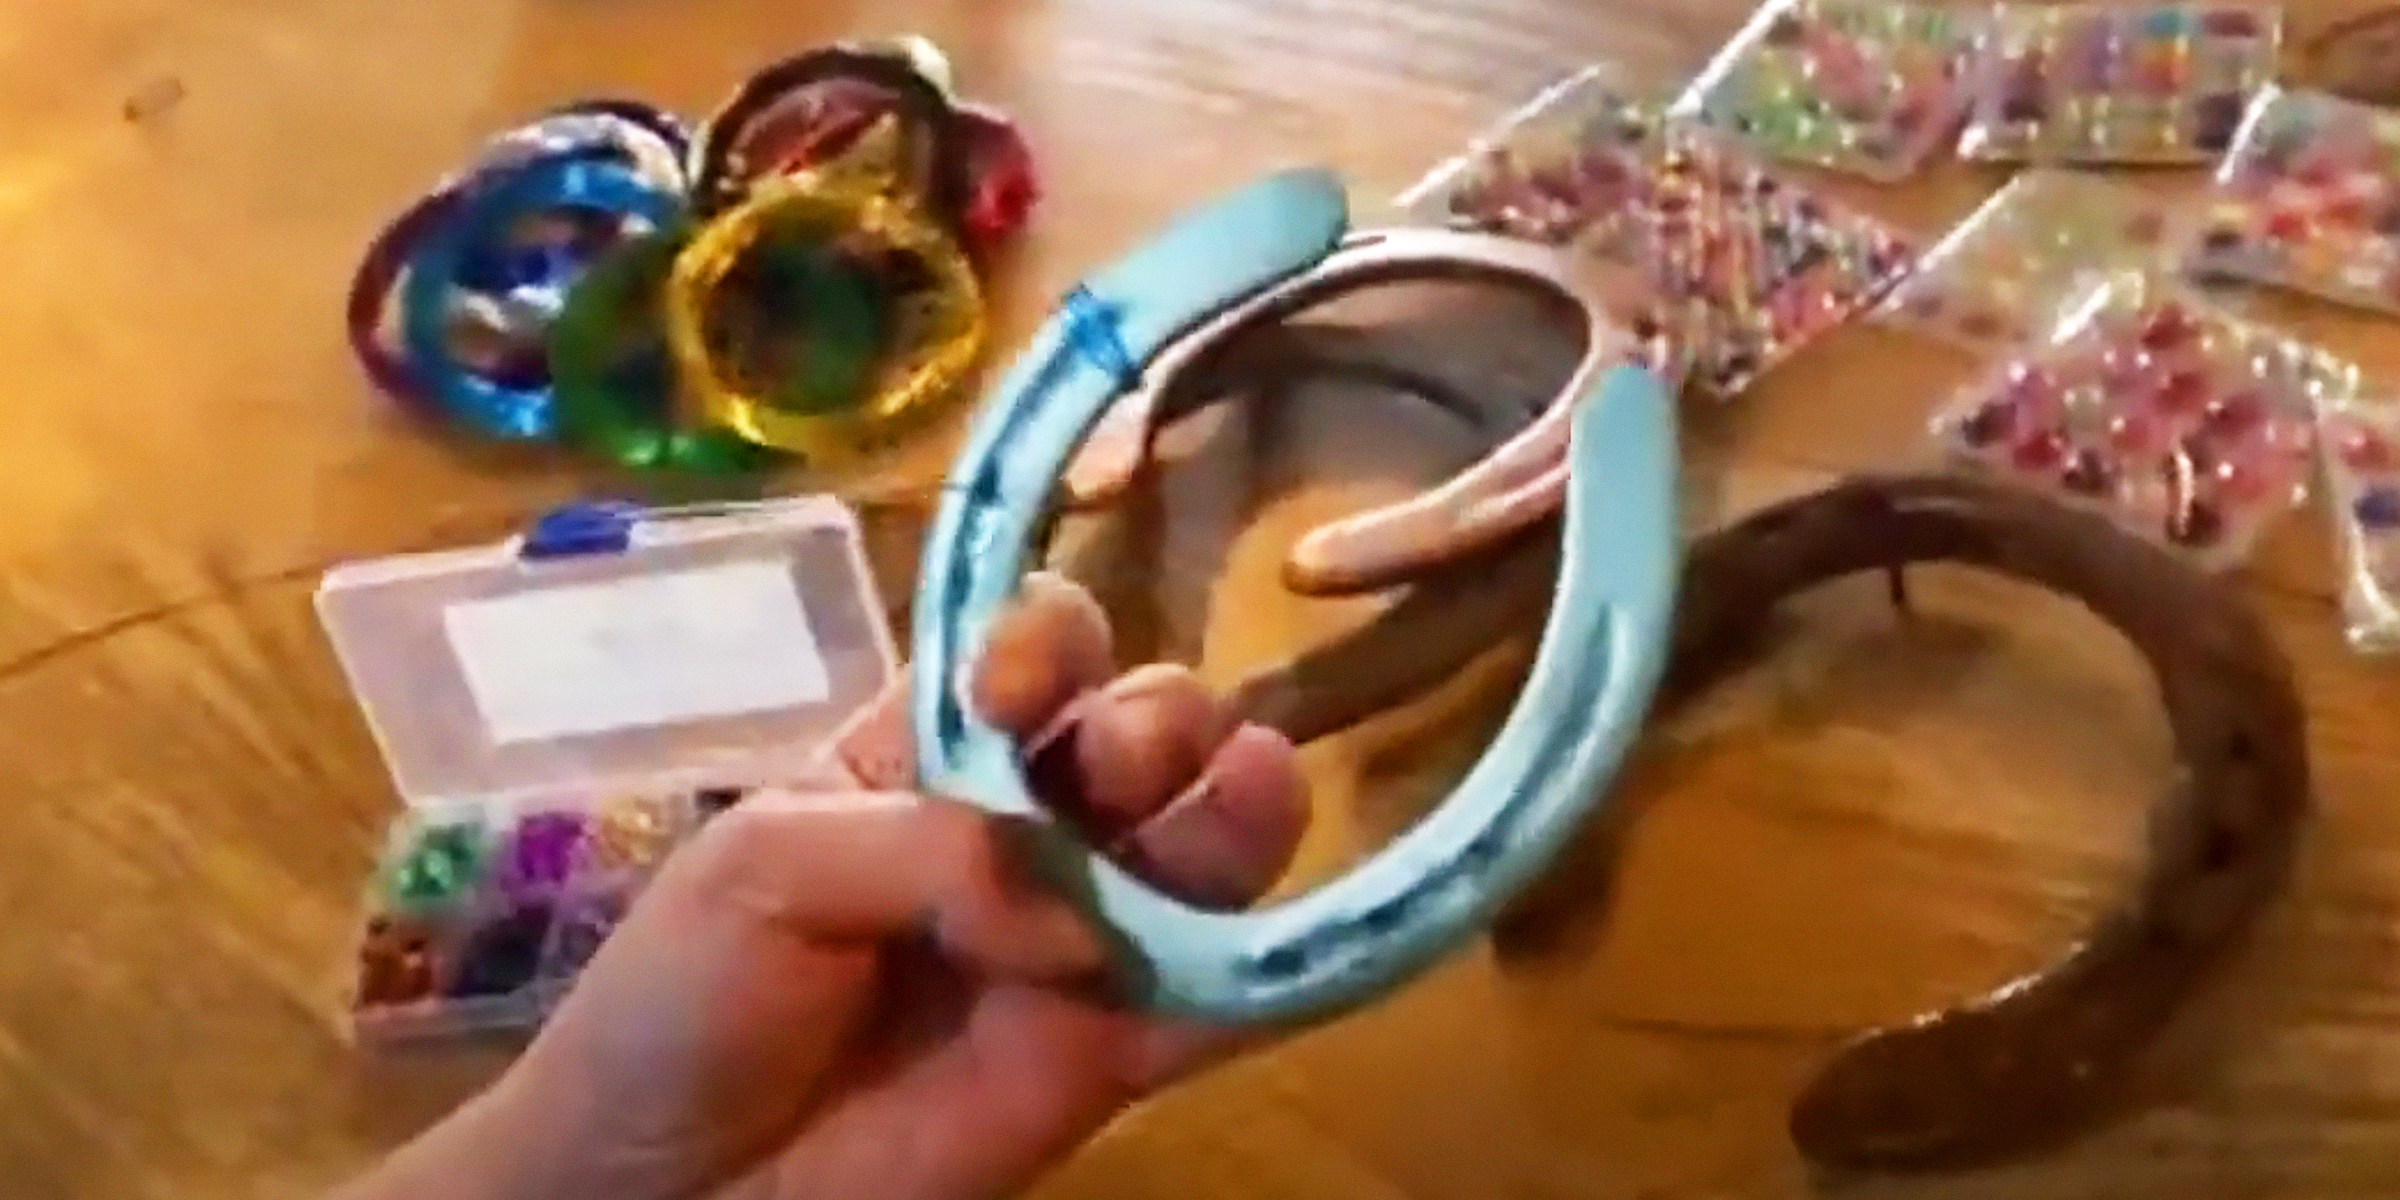
Transform ordinary metal into an extraordinary charm! Learn how to decorate horseshoes with our easy DIY guide, turning them into personalized tokens of luck and gifts for any occasion.
Mar 13, 2024

Rev up your creativity and personalize your ride with DIY car accessories—simple, affordable projects that add functionality and flair to your vehicle.
Apr 24, 2024

Ready to enhance your property with a blend of rustic charm and practicality? Our DIY hog wire fence guide is here to walk you through creating a durable and stylish boundary for your space.
Apr 10, 2024

Embark on a creative journey and revamp your bedroom aesthetics with a DIY wardrobe door. With a touch of ingenuity and these simple steps, you can tailor a personalized and budget-friendly solution.
Feb 03, 2024
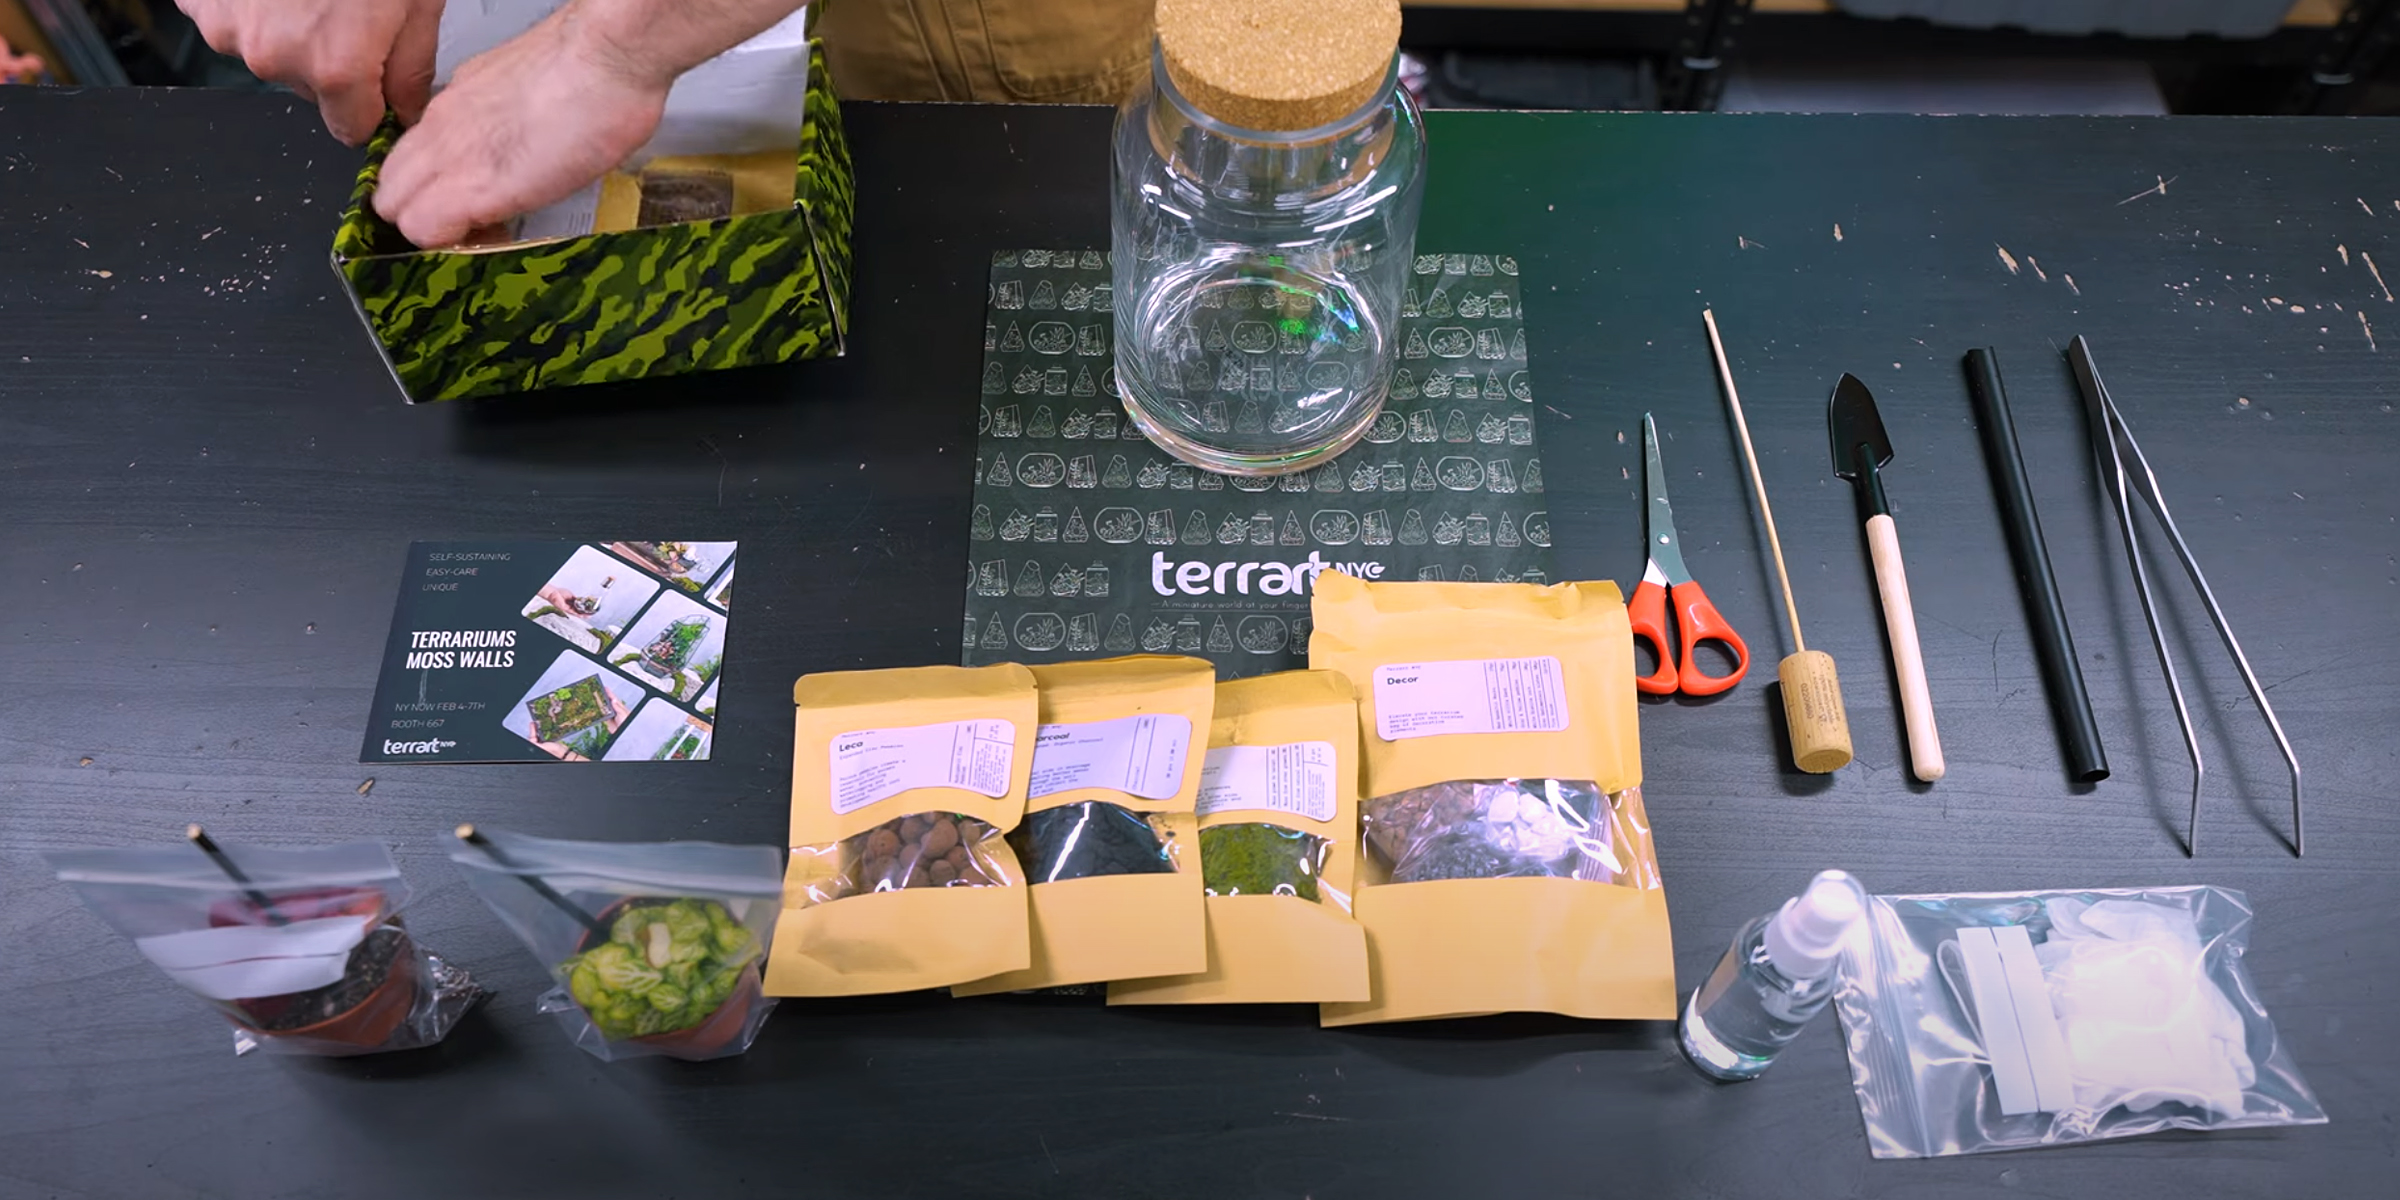
Unleash your inner gardener and add a splash of green to your space with a DIY terrarium kit for adults—an easy and enjoyable way to create your personal oasis of tranquility
Apr 23, 2024
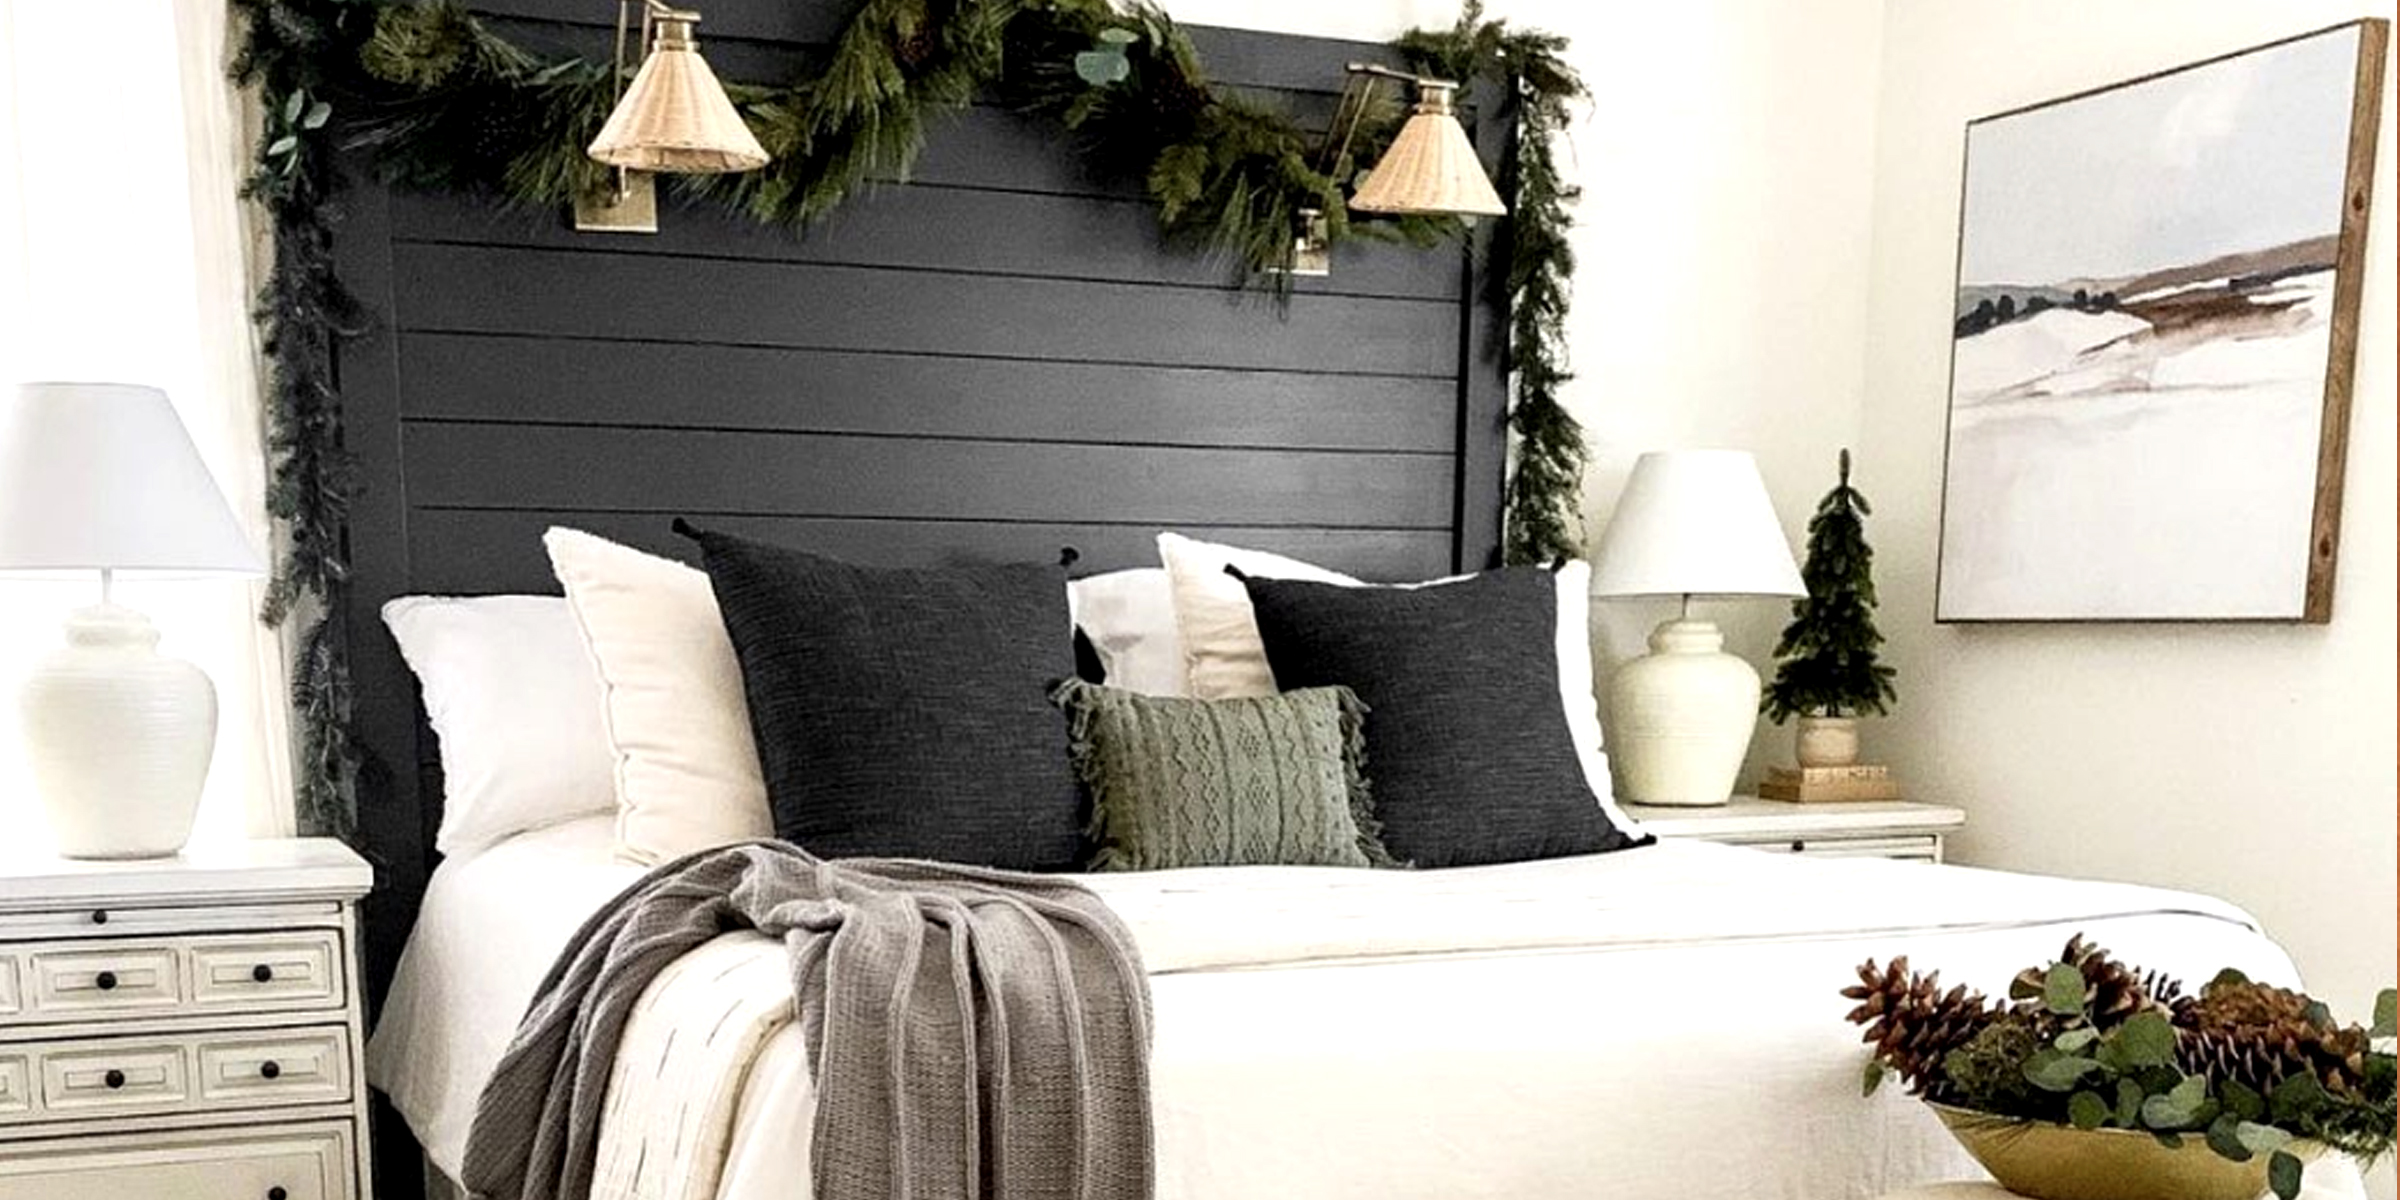
Elevate your bedroom's style with a personalized touch by crafting a DIY shiplap headboard. This project not only adds a rustic, farmhouse flair to your space but also allows you to create a custom focal point that is both functional and stylish.
Apr 18, 2024

Want to envelop your event in an aura of mystery? Master how to make fog juice with our straightforward DIY guide, and transform any space into an enchanting mist-filled wonderland.
Mar 10, 2024
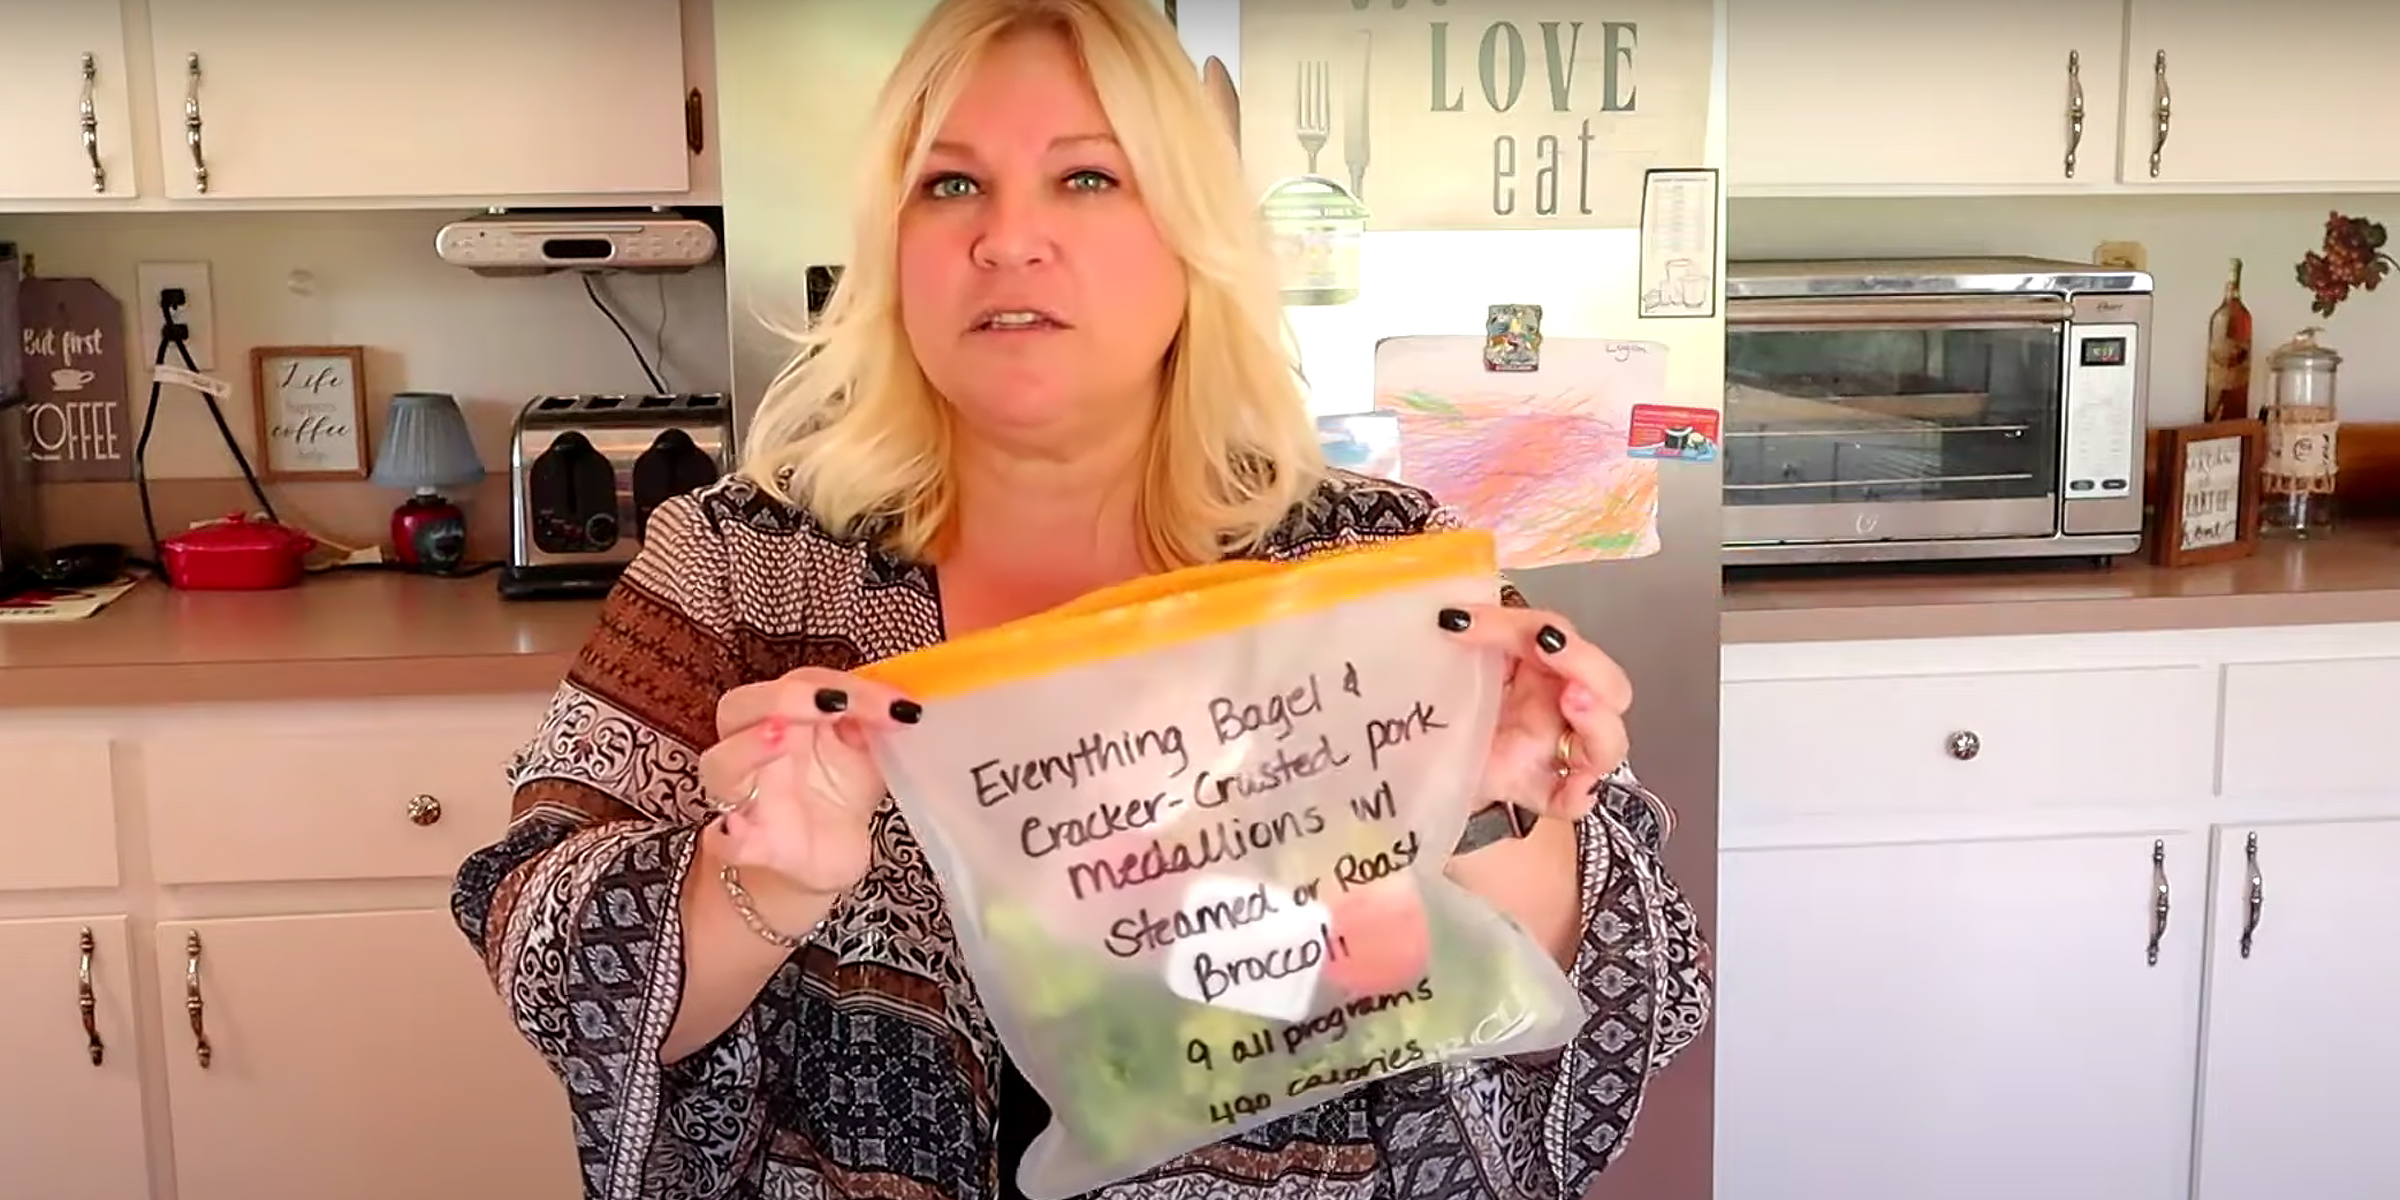
Transform your kitchen into a gourmet oasis without stretching your budget. Discover the joy and simplicity of DIY meal kit crafting, where culinary creativity meets convenience.
Apr 05, 2024

Take the wheel in style and comfort by crafting your very own DIY steering wheel cover! Perfect for enhancing grip and adding a personal touch to your vehicle, this simple project is not only rewarding but also provides a practical upgrade to your driving experience.
Apr 20, 2024
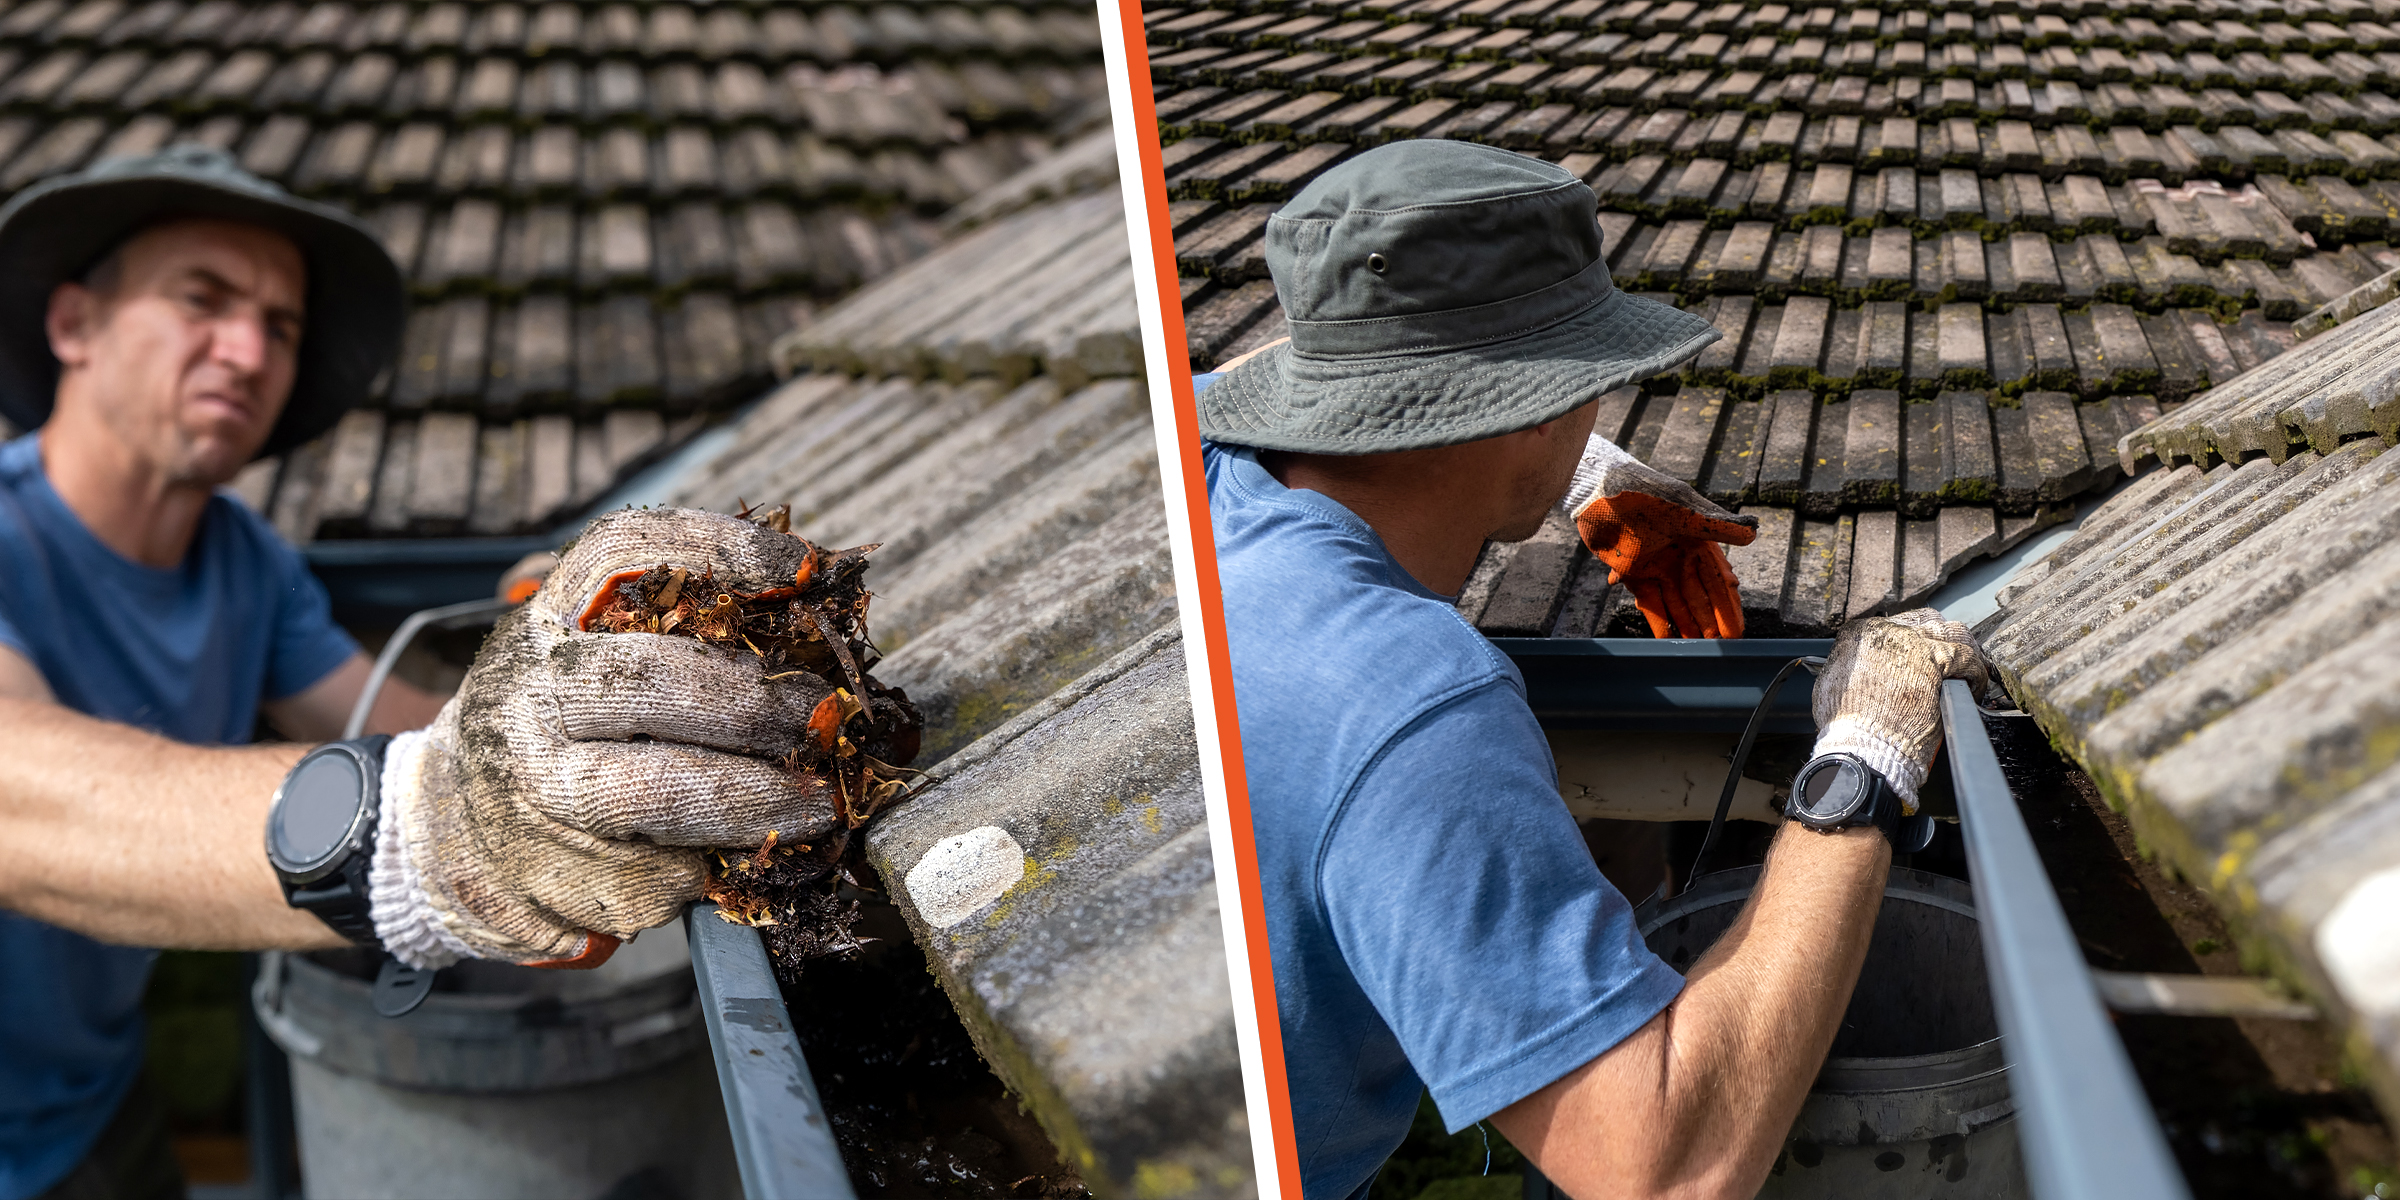
In a world where convenience is king, the quest for efficient home maintenance solutions is never-ending. Enter the revolutionary concept of DIY gutter guards — your ultimate ally against the tedious task of gutter cleaning.
Apr 12, 2024
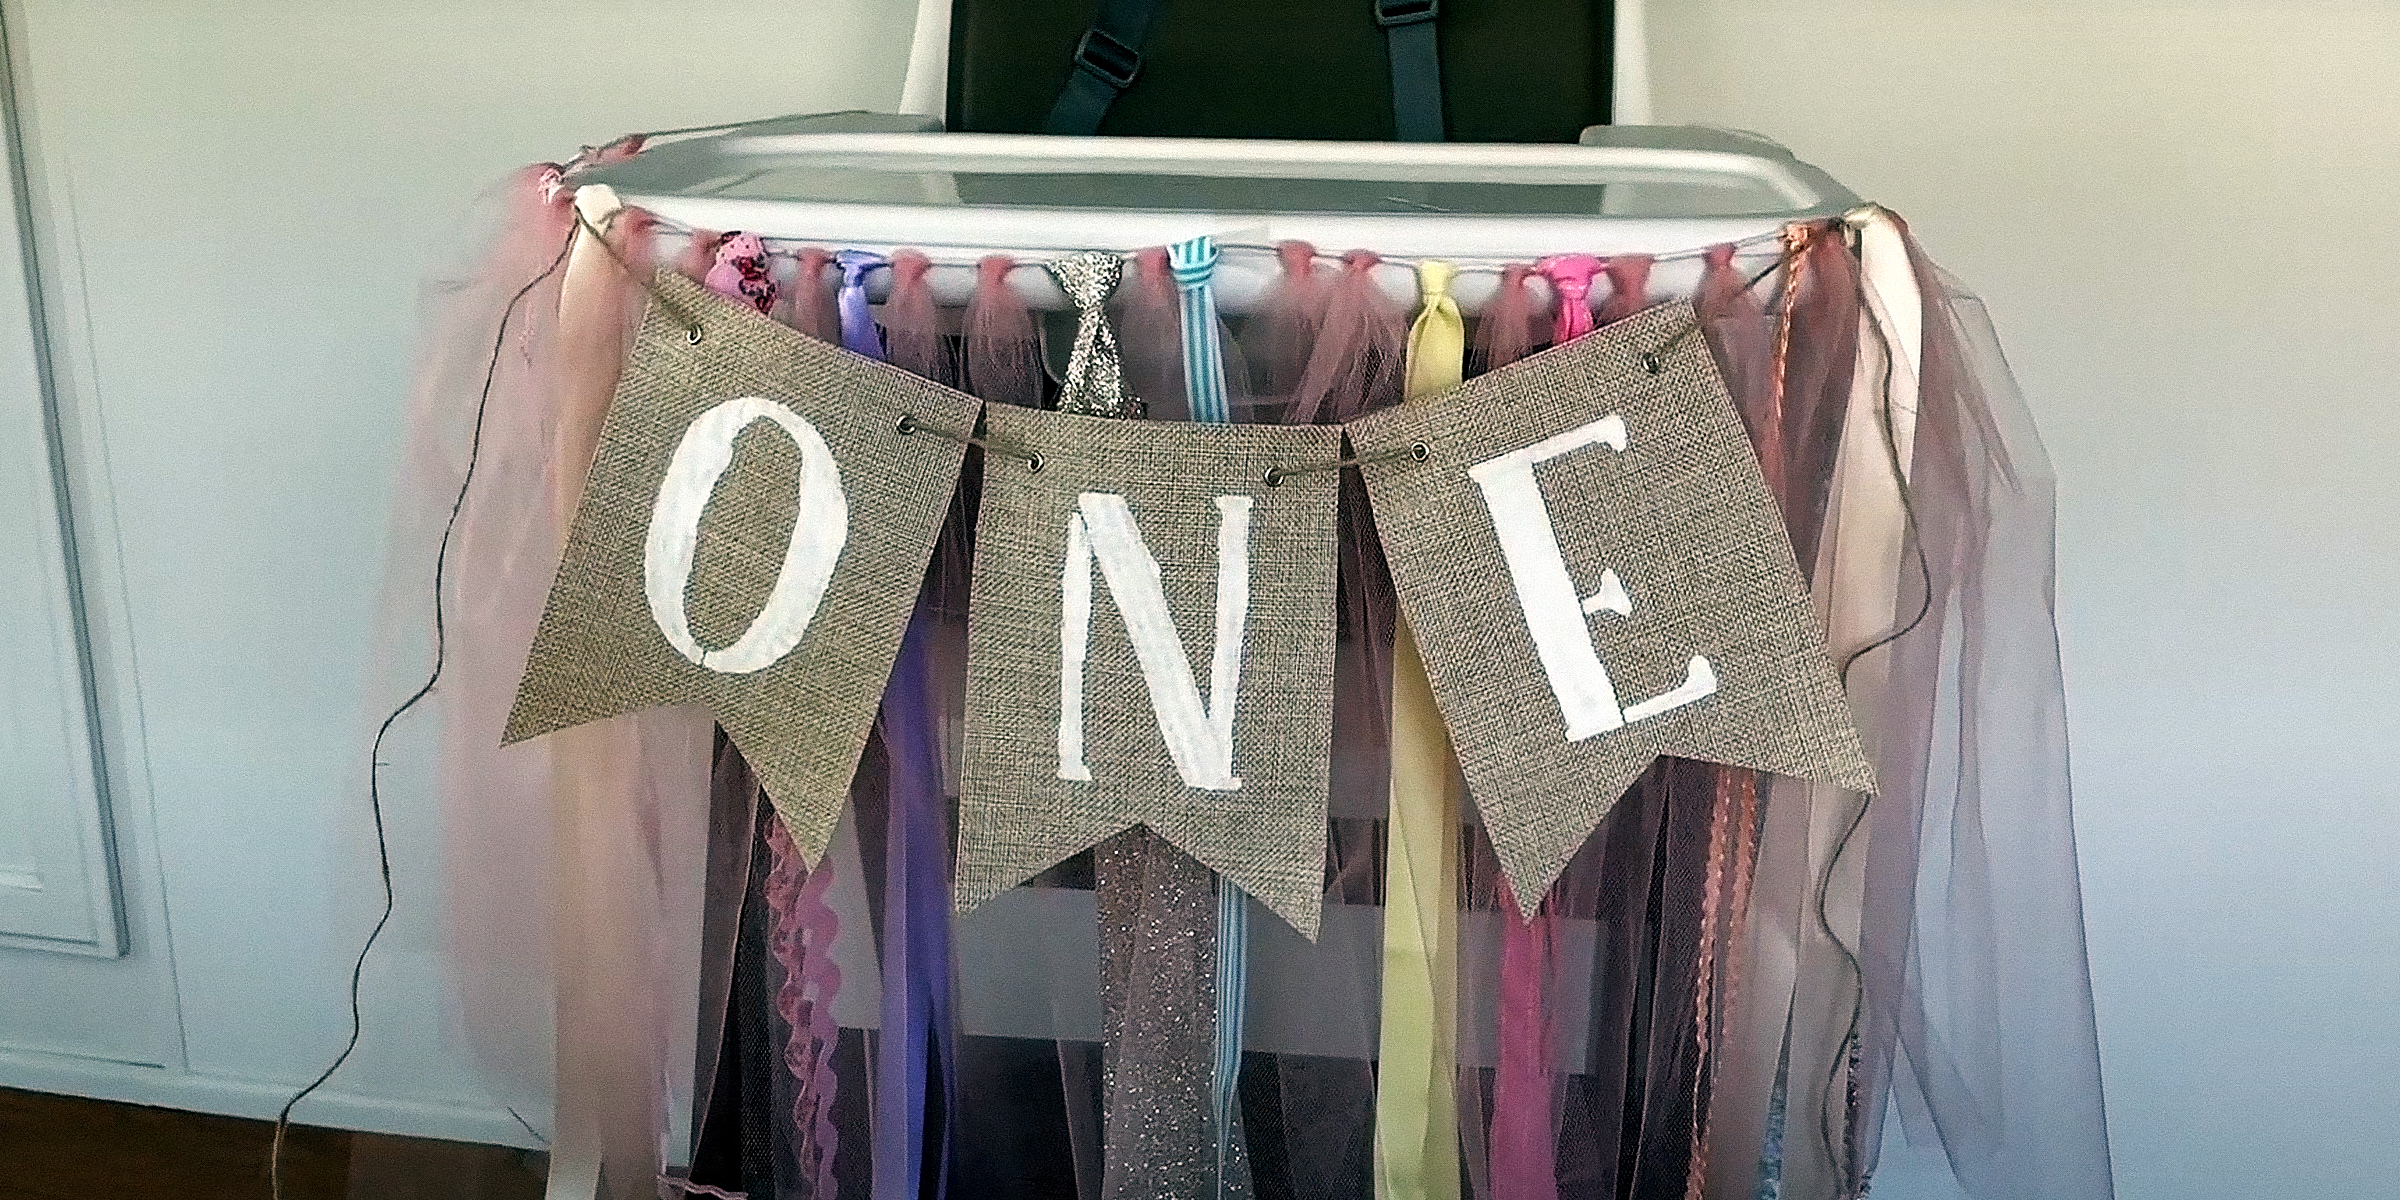
Celebrate your baby’s milestone in style! Crafting a DIY high chair banner is a fun, cost-effective way to add a personal and decorative touch to any special occasion. With simple materials and easy-to-follow steps, this project is perfect for both seasoned crafters and those new to DIY.
Apr 22, 2024

In the realm of do-it-yourself crafts, silicone beads have emerged as a popular medium due to their durability, safety, and flexibility. Discover how to make silicone beads from scratch.
Mar 17, 2024
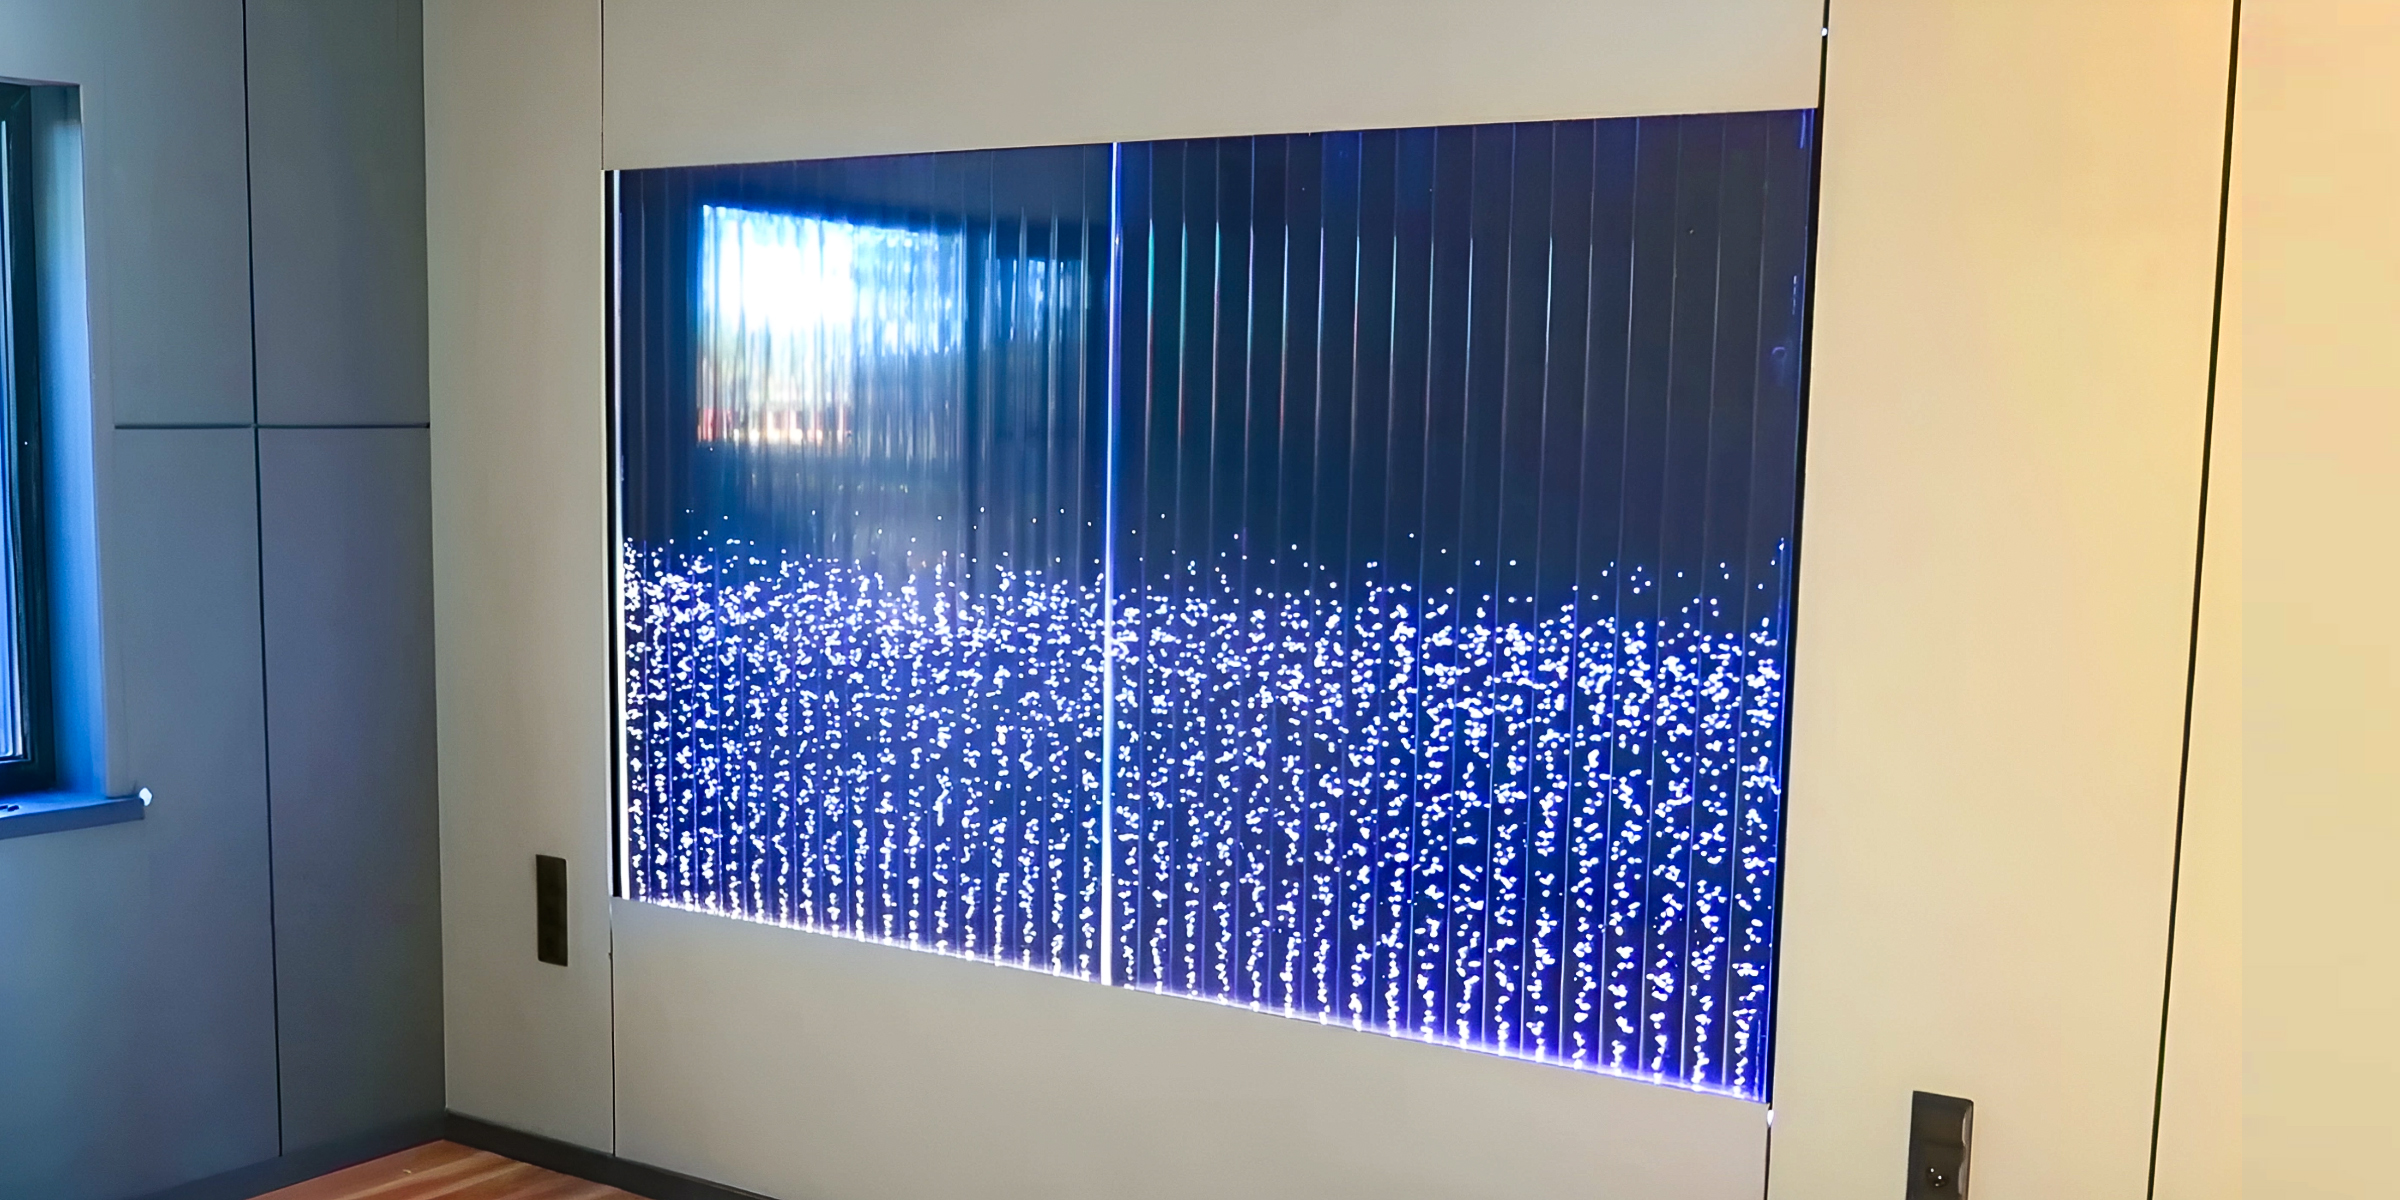
Bubble walls bring the benefits of surrounding yourself with nature into the comfort of your personal space. If you're considering installing one but want to do so independently, follow this DIY bubble wall guide.
Feb 09, 2024

Embark on a journey of care and savings with our DIY dog ear cleaner guide, ensuring your furry friend's ears stay clean and healthy without breaking the bank.
Apr 13, 2024